
What You Need to Know Before You Build
Plenty of people get into leatherworking because they want to start making leather armor for cosplay, LARP, stage costumes, or historical-inspired builds.
Armor introduces a different set of problems than a wallet or simple bag. The finished piece has to fit a moving body, hold the intended shape, stay comfortable for hours, and connect to the rest of the costume without pulling itself apart.
The most common beginner mistake is treating thickness as the whole answer. A stiff 8-ounce tooling leather and a softer 8-ounce leather can behave very differently. Pattern shape, temper, reinforcement, articulation, and the way the piece is strapped all matter.
This guide covers the practical starting points: choosing leather, testing the pattern, wet forming, controlled stiffening, and building armor that can move with you.
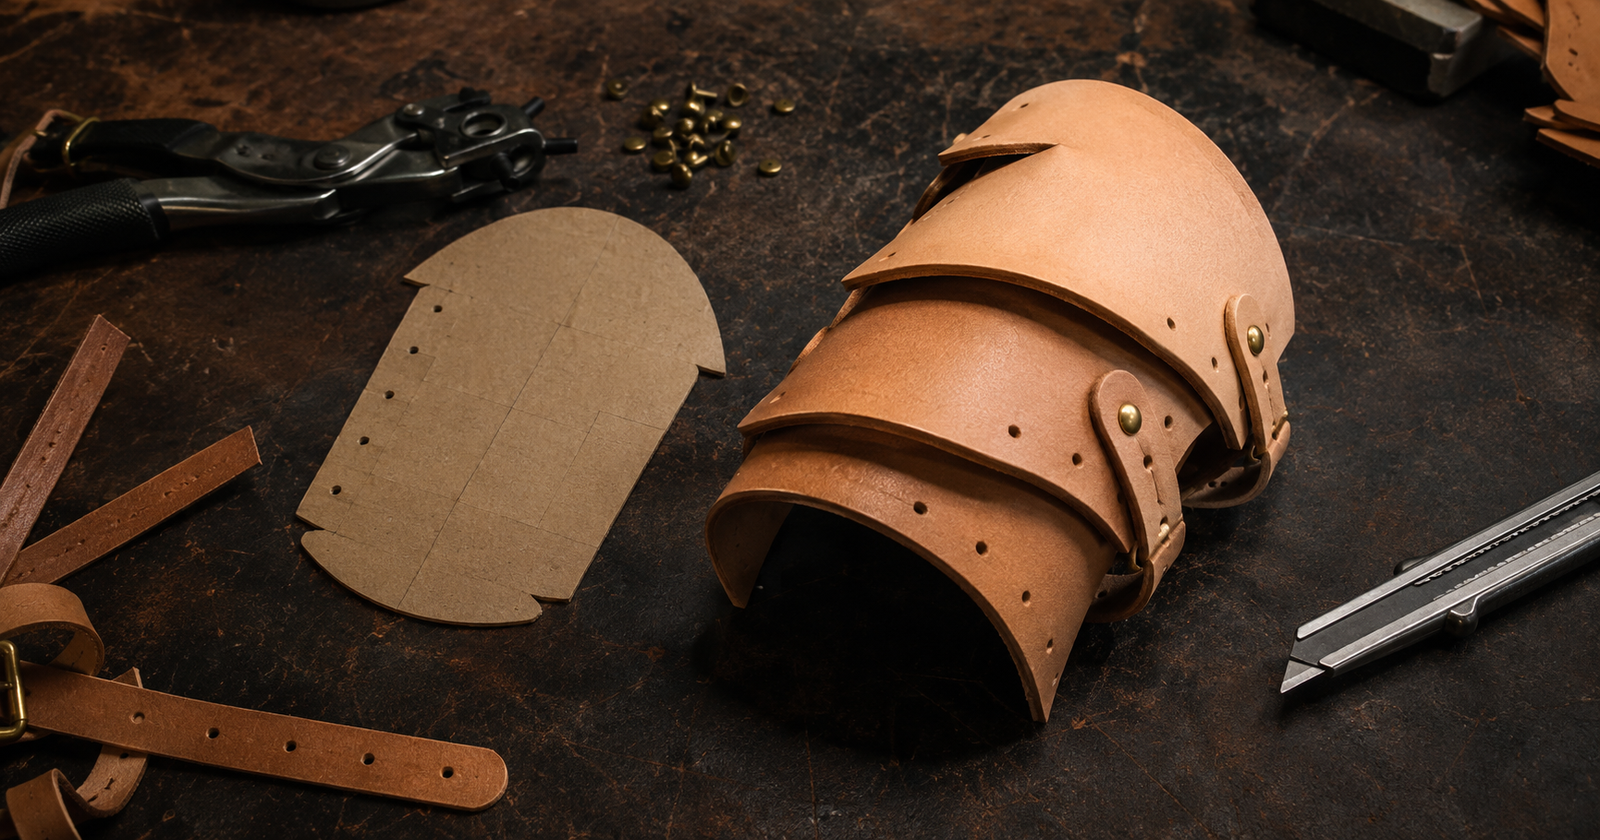
A real armor build in progress. The cardboard pattern, loose hardware, and cut straps on the bench tell the whole story before a single rivet is set.
Decide What the Armor Must Do
Before buying leather, decide whether you are making a costume, decorative LARP kit, stage piece, historical interpretation, or equipment for an activity that allows physical contact. Those are not the same job.
- Cosplay and stage armor: Appearance, comfort, weight, and freedom of movement usually matter more than impact resistance.
- Decorative LARP armor: The piece may need to survive running, kneeling, weather, and repeated wear, but the event may have specific rules about materials and construction.
- Contact play or reenactment: Follow the organization’s written equipment rules. Do not assume that a thick piece of leather automatically qualifies as protective armor.
Leather armor can be tough and durable, but a costume tutorial should not be treated as safety certification. Check the rules for the event before designing the build around a particular thickness or hardening method.
Choosing Leather, Weight, and Temper
Best beginner choice: Firm natural vegetable-tanned leather is usually the easiest material to carve, stamp, wet form, dye, and stiffen.
Vegetable-tanned leather is the usual starting point for shaped armor because it absorbs water, becomes easier to form, and stiffens again as it dries. It also accepts carving and stamping far better than most soft garment leathers.
That does not mean every armor component must be vegetable tanned. Soft chrome-tanned leather can work well for flexible panels, backing, skirts, padded sections, straps, and costume pieces that are meant to drape rather than hold a molded shell. What it generally will not do is carve, stamp, or wet form like traditional tooling leather.
Use these weight ranges as starting points rather than fixed rules:
- 3 to 5 oz: Flexible costume panels, layered details, scales, trim, and pieces that need easy movement.
- 5 to 7 oz: Bracers, greaves, shoulder components, masks, smaller molded pieces, and many general cosplay builds.
- 7 to 9 oz: More structural breastplates, larger pauldrons, rigid bracers, belts, and parts that need to hold a stronger shape.
- 10 oz and heavier: Very substantial panels, heavy straps, and specialized builds where the pattern and intended activity justify the extra weight and stiffness.
Temper matters as much as weight. A firm 6-ounce side may hold a molded shape better than a soft 8-ounce hide. Whenever possible, buy a sample or ask the supplier how firm the leather is before ordering enough for an entire set.
Bench note: Heavy leather does not automatically make better armor. It can also make the costume hot, exhausting, difficult to articulate, and uncomfortable around the neck and shoulders.
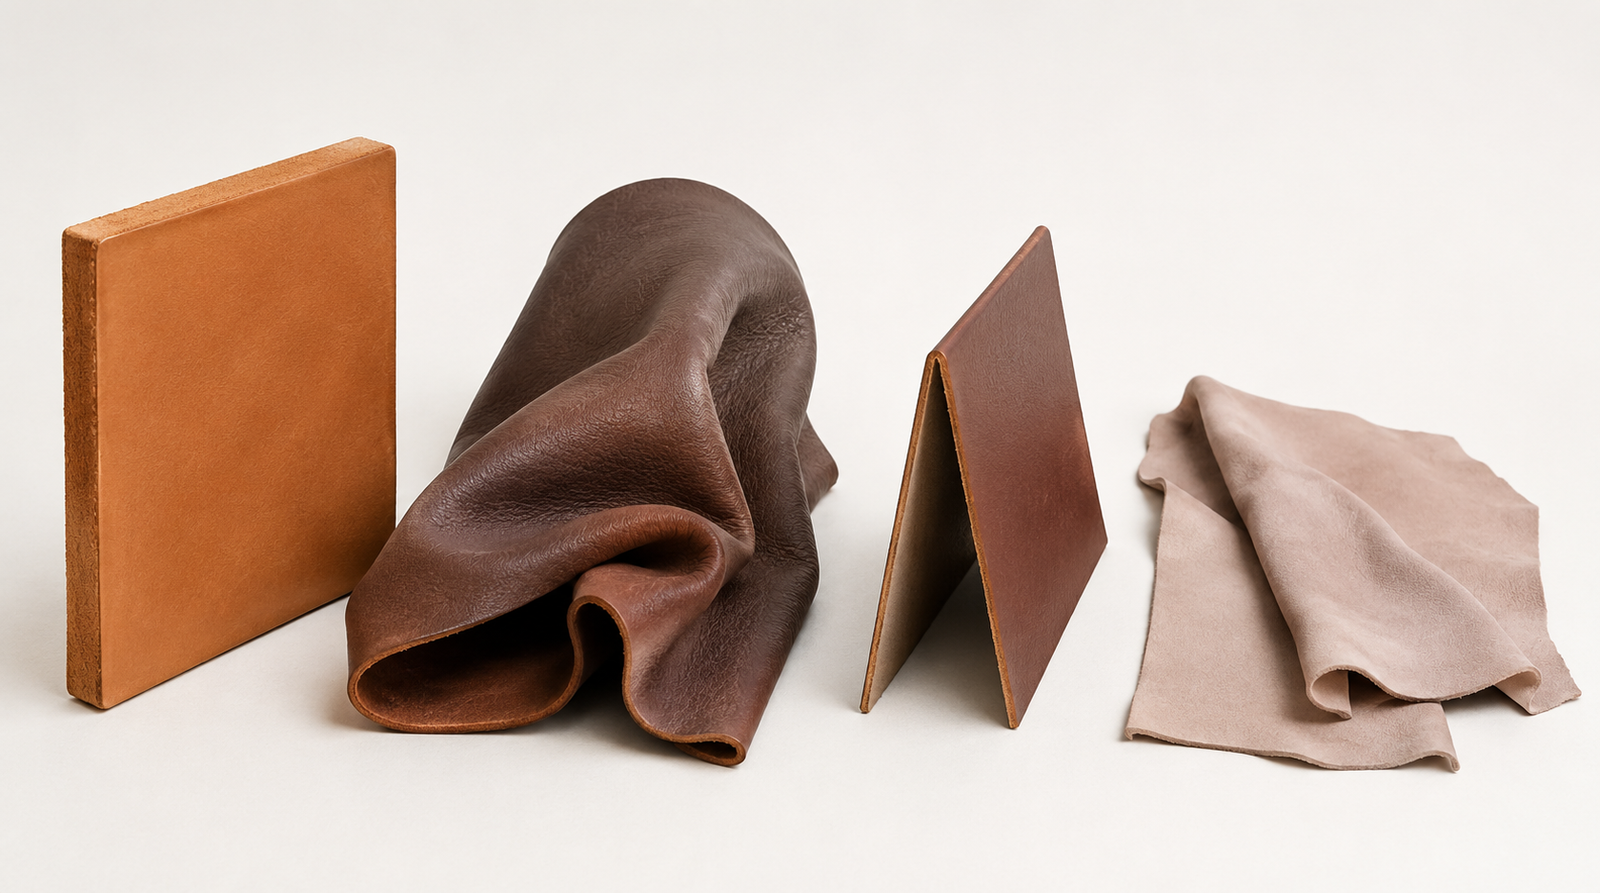
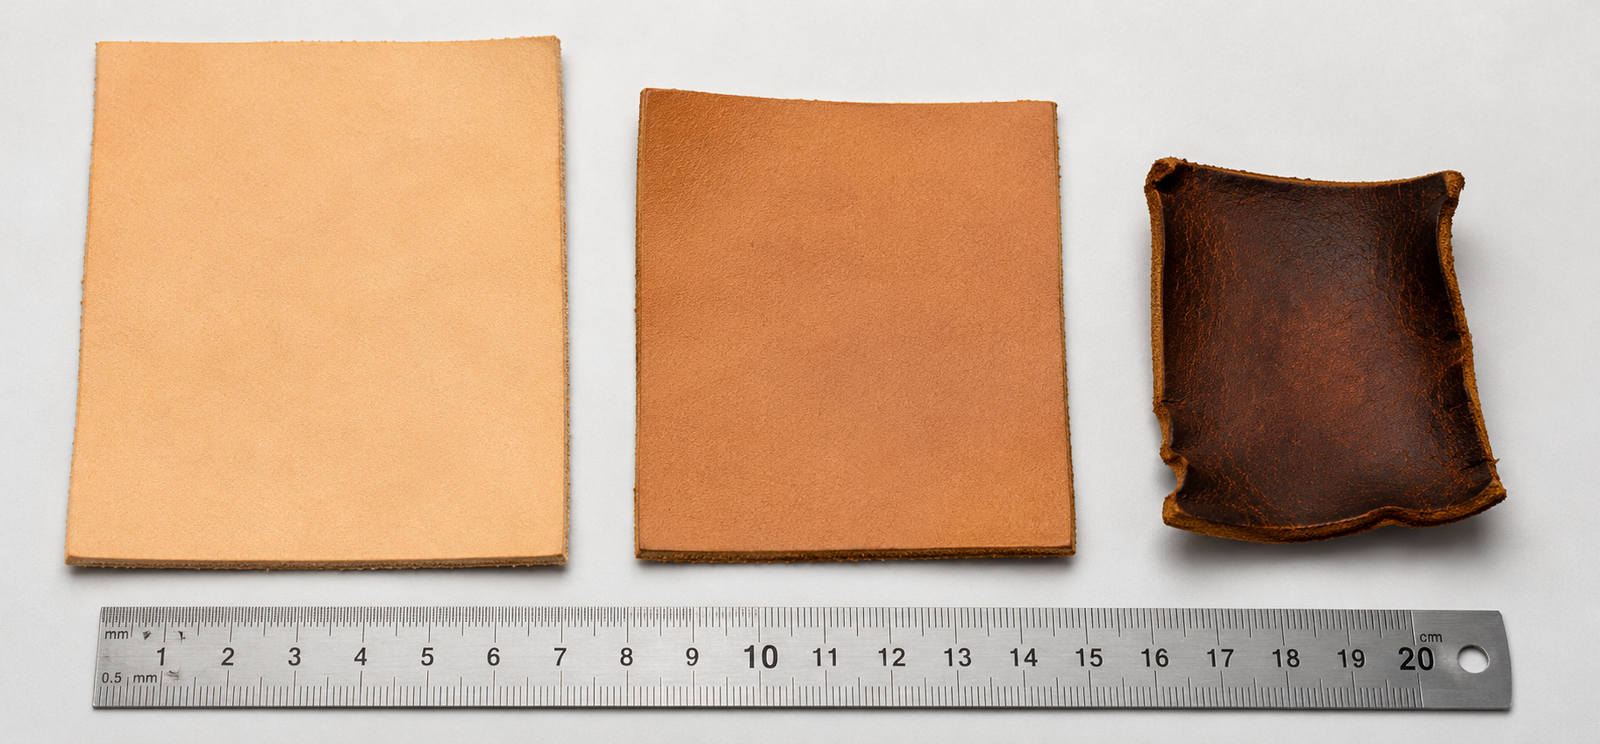
Thickness and stiffness are not the same measurement. The thick dark piece has no structure at all. The thinner piece beside it holds its shape. Weight tells you one thing. Temper tells you another.
Patterns, Fit, and Articulation
Do not cut an expensive hide until the pattern works in a cheaper material. Poster board, cereal-box cardboard, craft foam, or thin plastic sheet can all help you test the shape first.
Wear the mock-up and move through the actions the finished costume must allow. Raise both arms. Bend the elbows. Sit down. Turn at the waist. Kneel if the character or event requires it.
Watch for the places where rigid sections collide. A bracer that looks perfect with a straight arm may dig into the wrist or elbow when you bend it. A breastplate may ride into the throat when you sit. Pauldrons can block the arms if the overlaps are arranged in the wrong direction.
Leave room for the full costume
Fit the pattern over whatever will be worn underneath it. Clothing, padding, gambesons, belts, and hidden harnesses all change the final measurements.
Build adjustment into the straps
Buckles, slots, Chicago screws, and replaceable straps make later corrections much easier. Bodies move, underlayers change, and leather can relax with use. A little adjustment is far more useful than a perfect fit that only works in one position.
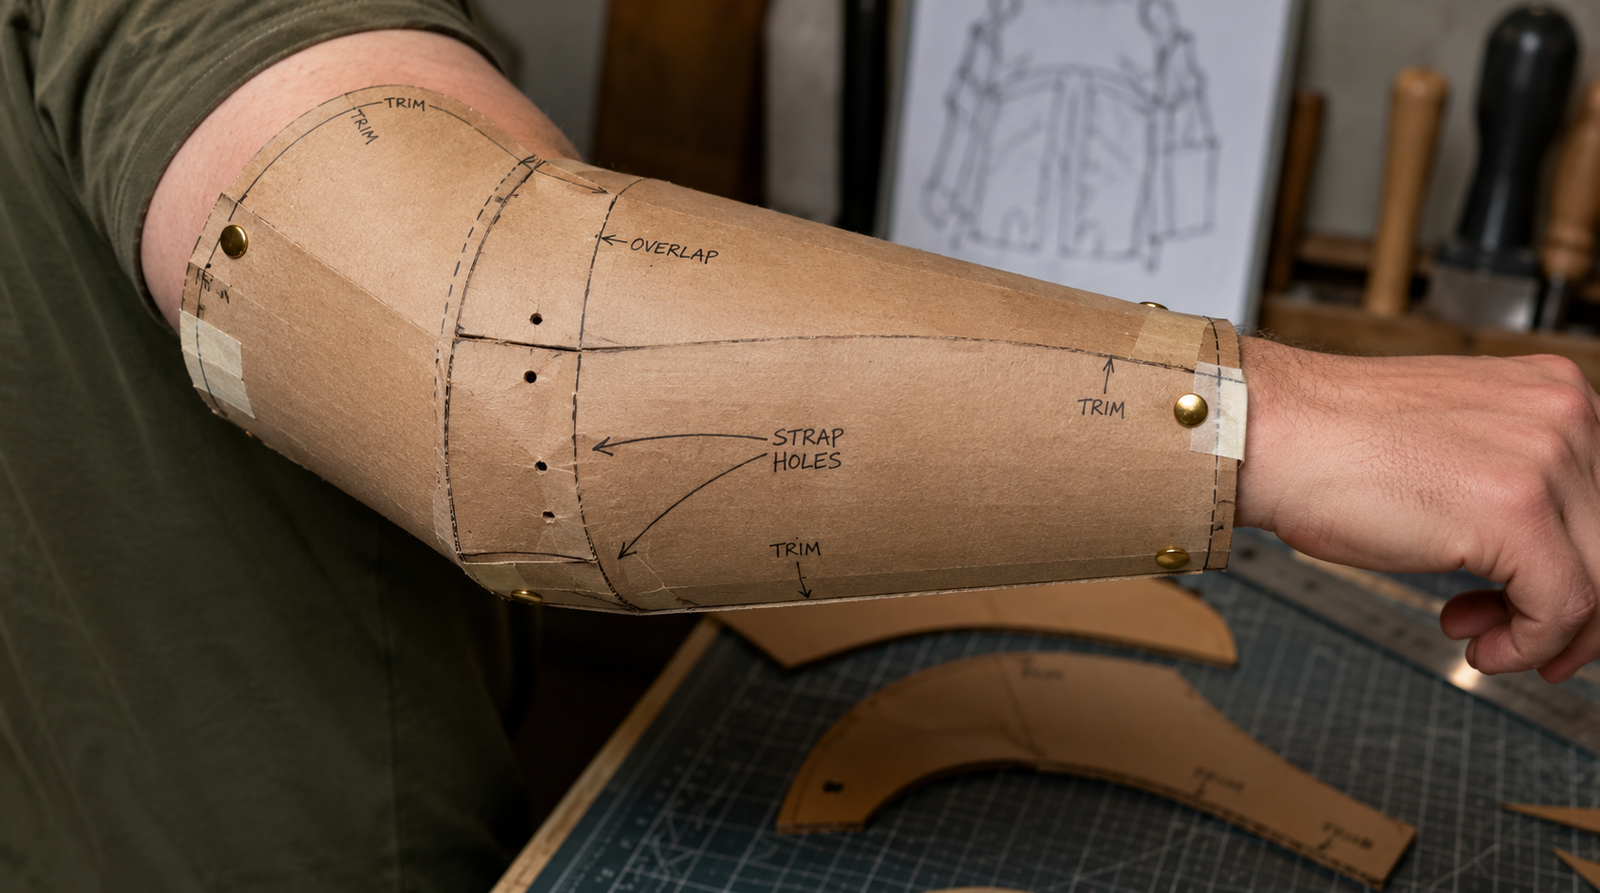
Test the pattern before you cut the leather. This cardboard bracer mock-up shows trim lines, overlap zones, and strap hole locations marked in pencil. A small error here costs nothing. The same error in leather costs a hide.
Wet Forming the Leather
Firm vegetable-tanned leather becomes more pliable when evenly dampened. As it dries, it firms up and retains much of the shape formed into it.
You do not always need to soak the piece completely. For many armor parts, begin by wetting both sides evenly with a sponge or brief dip in room-temperature water. Give the moisture time to move into the leather. It should become flexible without turning limp, swollen, or mushy.
Form the leather over a mannequin, rounded wooden mold, sealed foam form, pipe, bowl, or another smooth object that matches the curve you need. Use your hands or a smooth modeling tool to work the leather gradually into shape.
Hold the piece in position with straps, clamps, elastic wrap, or a matching second form. Protect the grain from clamp marks and sharp edges.
Let the leather dry completely before judging the final stiffness. Thick pieces may feel dry on the surface while still holding moisture inside.
Bench note: Test the process on an offcut from the same hide. Different tannages, finishes, weights, and even different sections of one side may absorb water and shrink differently.
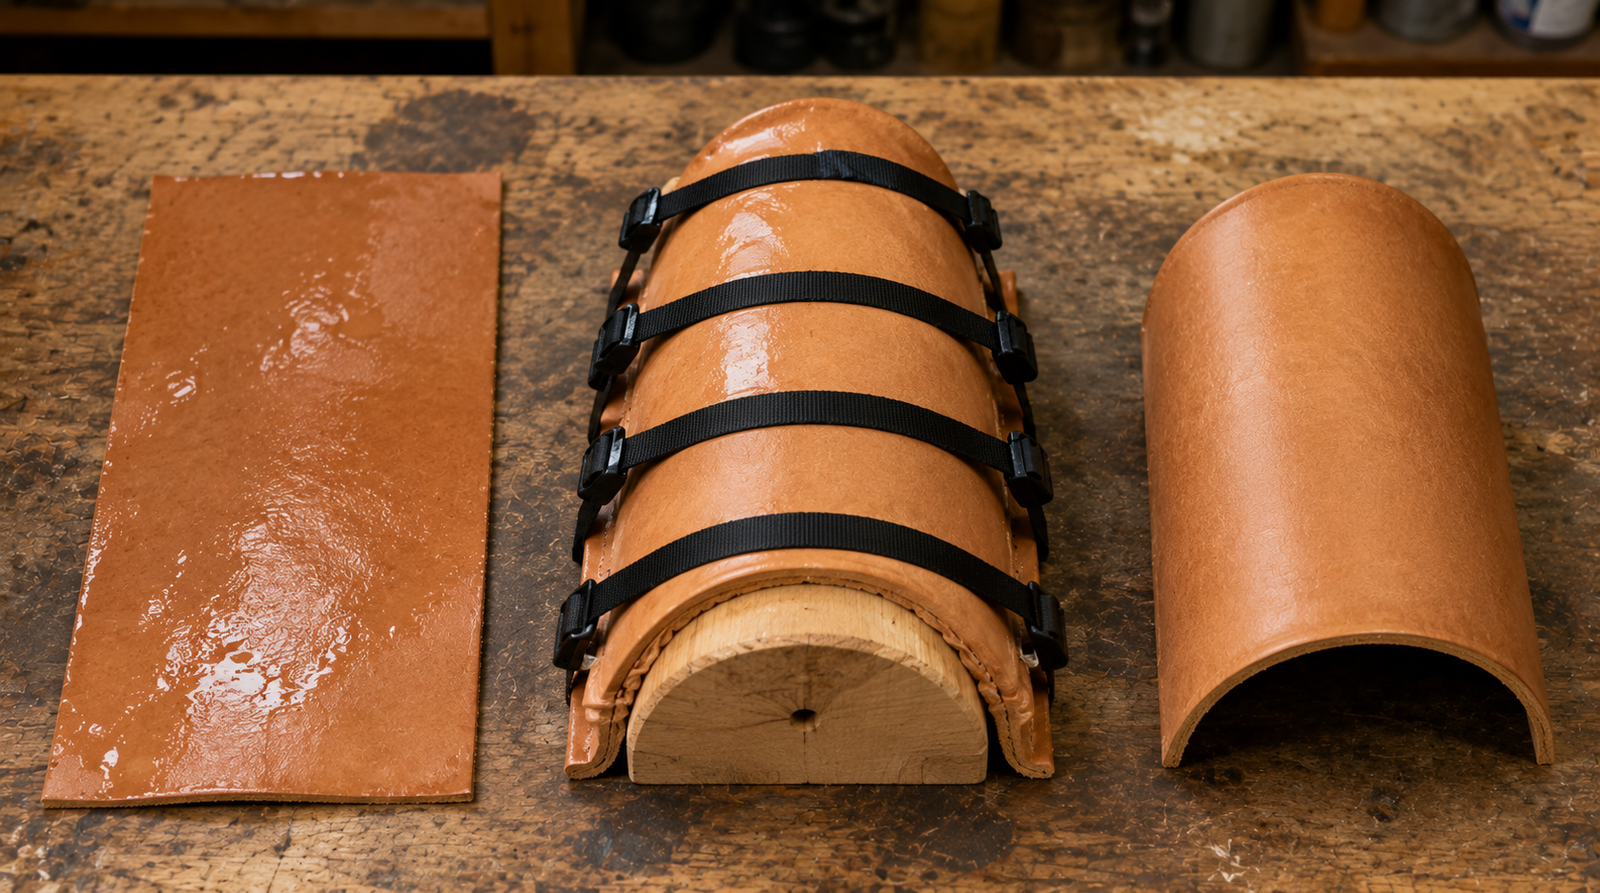
Wet forming in three stages. Left: flat and damp. Center: strapped over the mold while still pliable. Right: the dried piece holding its shape on its own.
Stiffening and Hardening Leather
Wet forming alone may create enough stiffness for many cosplay and decorative armor pieces. Before adding another treatment, let the molded part dry fully and see whether it already holds the shape you need.
Heat can make vegetable-tanned leather harder, but it also causes shrinkage. As the temperature rises, the change can happen quickly. The piece may curl, become uneven, lose tooling detail, or turn brittle if pushed too far.
If you experiment with hot-water hardening, use scrap from the same hide first. Measure the sample before and after treatment so you can see how much it shrinks. Use controlled heat, watch it continuously, and remove it as soon as the reaction begins. Do not start with a completed breastplate or an irreplaceable carved panel.
Wax impregnation, internal reinforcement, layered construction, and modern purpose-made stiffeners are other options. Each changes the weight, flexibility, finish, repairability, and feel of the leather, so test the full finishing process before applying it to the finished armor.
Important: Harder does not always mean better. A slightly flexible piece is often more comfortable and less likely to crack than a shell hardened as far as possible.
Heat shrinks leather and the change happens fast. Left: untreated. Center: moderately hardened. Right: pushed too far. The ruler shows how much material was lost. Always test on scrap from the same hide before treating a finished piece.
Common Beginner Mistakes
Buying the heaviest leather available
More thickness adds weight and makes articulation harder. Choose enough structure for the design, not the largest ounce number you can find.
Skipping the cardboard mock-up
A small pattern error becomes an expensive leather error. Test every major panel and joint before cutting the hide.
Forgetting the underlayers
Armor fitted over a T-shirt may not fit over the shirt, padding, cloak, or costume layers worn at the event.
Putting rivets directly at stress points
Leave enough leather around holes and reinforce heavily loaded connections. A rivet cannot save a narrow tab that is already trying to tear.
Hardening before the fit is proven
Once a piece has been aggressively stiffened, correcting the shape becomes much harder. Confirm the pattern, movement, holes, and strap locations first.
Finishing every part separately
Dye, oil, topcoat, and heat can all change the leather. Make a complete test sample using the same sequence planned for the armor.
Where to Find Armor Leather and Patterns
A full armor build can consume more leather than expected, especially after pattern testing, rejected pieces, and straps. Buying full sides or double shoulders is usually more economical than buying precut panels.
Shoulders, double shoulders, bends, sides, and precut panels each suit different parts of the build. For matched bracers, greaves, or pauldrons, make sure the cut provides enough consistent leather for both sides.
Use our directories to compare sources for firm vegetable-tanned leather, hardware, printable patterns, and leathercraft designers. Check the project requirements before buying, especially when a pattern recommends a particular weight or temper.